Understand Styles in Android - Part 1. What it is for and how to used it


In android, view hierarchy usually are created via layout xml file. In the file, to instantiate a TextView we write:

1
2
3
4
<TextView
android:layout_width="wrap_content"
android:layout_height="wrap_content"
android:text="Sample 1" />

Usually, we need to specify the visual of the TextView, so we keep adding attributes to the TextView element:

1
2
3
4
5
6
7
8
9
10
11
12
<TextView
android:layout_width="wrap_content"
android:layout_height="wrap_content"
android:text="Sample 1"
android:background="@drawable/category_indicator_background"
android:gravity="center"
android:maxLines="1"
android:paddingBottom="12dp"
android:paddingLeft="22dp"
android:paddingRight="22dp"
android:paddingTop="12dp"
android:textSize="12sp" />

Usually to fully customize visual representation of a view needs a lot of attributes and resources. Such as in this example. we added background, gravity, maxLines, padding and textSize, which is a lot of code.

And if we want to create another TextView with exactly same visual representation, we need to copy all the values again:

1
2
3
4
5
6
7
8
9
10
11
12
13
14
15
16
17
18
19
20
21
22
23
24
25
<TextView
android:layout_width="wrap_content"
android:layout_height="wrap_content"
android:text="Sample 1"
android:background="@drawable/category_indicator_background"
android:gravity="center"
android:maxLines="1"
android:paddingBottom="12dp"
android:paddingLeft="22dp"
android:paddingRight="22dp"
android:paddingTop="12dp"
android:textSize="12sp" />
<TextView
android:layout_width="wrap_content"
android:layout_height="wrap_content"
android:text="Sample 2"
android:background="@drawable/category_indicator_background"
android:gravity="center"
android:maxLines="1"
android:paddingBottom="12dp"
android:paddingLeft="22dp"
android:paddingRight="22dp"
android:paddingTop="12dp"
android:textSize="12sp" />

Obviously, in this piece of code, there are a lot of duplications. We need to compare all the values to figure out the 2 TextViews have the same visual. If we want to change the style, we need to update 2 TextViews. And the last, if we want to create the 3rd TextView or even more ones, we need copy the code again and again, which makes the issue become more troublsome.

In a short word, the code has bad readability, bad maintainability, bad reusability. In the book Refactor, we know that code redundancy is bad smell. To mitigate the issue, we need to extract the shared code into another “unit”, and replace all the occurrences with the reference.

In Android layout xml, the extract “unit”, which represents the shared attributes, are called Style. After introduced Style, we have:

1
2
3
4
5
6
7
8
9
10
11
<TextView
android:layout_width="wrap_content"
android:layout_height="wrap_content"
android:text="Sample 1"
style="@style/TextView.Customized"/>
<TextView
android:layout_width="wrap_content"
android:layout_height="wrap_content"
android:text="Sample 2"
style="@style/TextView.Customized"/>
1
2
3
4
5
6
7
8
9
10
11
12
13
<resources>
<style name="TextView.Customized">
<item name="android:gravity">center</item>
<item name="android:background">@drawable/category_indicator_background</item>
<item name="android:paddingLeft">22dp</item>
<item name="android:paddingRight">22dp</item>
<item name="android:paddingTop">12dp</item>
<item name="android:paddingBottom">12dp</item>
<item name="android:textAppearance">@style/CategoryIndicator.Text</item>
<item name="android:textSize">12sp</item>
<item name="android:maxLines">1</item>
</style>
</resources>

Well, this is the basics about the Style: why we need it and how it is used.

Perform Clicks in Android Robolectric Unit Test

Robolectric is an awesome library that makes UI unit test on Android a lot easier and faster. In UI test, one of the most basic thing is to simulate user interaction, such as clicking a button.

Click on individual View

Click should be the most basic user interaction, besides invokeing the View.performClick() method, Robolectric provides a more smarter version Robolectric.clickOn(View), which checks the view visibility and enabled status before actually “click” the view. If a view is either not visible or disabled, the click action will not be performed. This mechanism is useful to avoid some silly cases in automated tests.

Long Click on individual View

Long click is a more advanced click action. To simulate a long click action, View.performLongClick() can be invoked. But since Robolectric doesn’t provide any long click helper, make sure you do it by yourself, including checking whether view is long-clickable, which usually will be set manually or more often, when View.setOnLongClickListener is invoked; view is visible and enabled as what click does. Although Long click is avaible to use, but from my experience, long click on a individual view is rarely used in real UI design, instead long click is usually performed on an item of list view or grid view. This is the trickest case that I’ll leave it to the last.

Click on item of List/Grid

Click on List View or Grid View item. Well, idally, this shouldn’t be so much different than click on a indiviual view. But in Android implementation, item click is handled by the list view with a much more complicated API. To perform an item click, boolean performItemClick(View v, int position, long id) can be invoked. performItemClick requires 3 parameters, the first one is the view being clicked, the second one is the position of clicked view’s corresponding data item in adapter and the last is the if of clicked view’s corresponding data item. Complicated, isn’t it?

In Android implementation, item view displayed in ListView/GridView is actually provided by its adapter. Adapter works like a presenter in MVP pattern that creates/update item view based on the item data it holds. It also provides the id for the item. So to perform a item click, besides the ListView/GridView, you also need its adapter.

Following implementation explains how it works:

1
2
3
4
5
public static void clickItem(AbsListView listView, int position) {
ListAdapter adapter = listView.getAdapter();
View itemView = adapter.getView(position, null, listView);
listView.performItemClick(itemView, position, adapter.getItemId(position));
}

In the code, AbsListView is the base class of ListView and GridView. To click the item, you need

  1. Get the adapter of the AbsListView
  2. Create an item view for specific position with adapter
  3. Calculate the item id of corresponding position
  4. Invoke performItemClick method with data we got before.

In the implementation, for simplicity reason, we ignored some cases, such as convertView reusing. From my experience, in most cases, it won’t impact the functionality, so we don’t need to worry about it, unless you clearly know that matters, then you need to cover them in your tests.

Long click and item of List/Grid

Well, this action is also not a commonly used. It is only used in limited cases, such as selecting multiple item or displaying context menu for specific item.
To perform a long click on the item is the most trickest case. In previous 3 cases, we either directly or indrectly depends on View.perform***Click method. But not sure why, android doesn’t provide similar public API method of item long click. By diving into Anrdoid source code, we can figure out that Item Long Click isn’t really handled by ListView itself, instead it is handled by a Runnable named CheckForKeyLongPress. To invoke method on this object isn’t that streight forward, and might involes unnecessary multithread issue.

I just want to click a item, why I have to deal with these unnecessary complicates? So I learnt from the CheckForKeyLongPress implementation, and implmented my own “API”:

1
2
3
4
5
6
7
8
9
10
11
12
13
14
public static void longClickItem(AbsListView listView, int position) {
if (!listView.isLongClickable())
return;
OnItemLongClickListener listener = listView.getOnItemLongClickListener();
if (listener == null)
return;
ListAdapter adapter = listView.getAdapter();
View itemView = adapter.getView(position, null, listView);
listener.onItemLongClick(listView, itemView, position, adapter.getItemId(position));
listView.performHapticFeedback(LONG_PRESS);
}

My main purpose of perform a click is to trigger the corresponding listener, so I tried to invoke the listener directly with some necessary pre-checks. This aporach will not triggers these UI effects, but I assume it can meet most test cases.

APPENDIX UIActions helper class

1
2
3
4
5
6
7
8
9
10
11
12
13
14
15
16
17
18
19
20
21
22
23
24
25
26
27
28
29
30
31
32
33
34
35
36
37
38
39
40
41
42
43
44
45
46
47
48
49
50
51
52
53
54
55
56
57
58
59
package me.timnew.robolectric.utils;
import android.app.Activity;
import android.app.Fragment;
import android.view.View;
import android.widget.AbsListView;
import android.widget.ListAdapter;
import org.robolectric.Robolectric;
import static android.view.HapticFeedbackConstants.LONG_PRESS;
import static android.widget.AdapterView.OnItemLongClickListener;
public class UiActions {
public static boolean clickOn(View view) {
return Robolectric.clickOn(view);
}
public static boolean clickOn(Activity activity, int targetViewId) {
return Robolectric.clickOn(activity.findViewById(targetViewId));
}
public static boolean clickOn(View parentView, int targetViewId) {
return Robolectric.clickOn(parentView.findViewById(targetViewId));
}
public static boolean clickOn(Fragment fragment, int targetViewId) {
//noinspection ConstantConditions
return Robolectric.clickOn(fragment.getView().findViewById(targetViewId));
}
public static void pressBackButton(Activity currentActivity) {
if (currentActivity.getFragmentManager().getBackStackEntryCount() > 0)
currentActivity.getFragmentManager().popBackStackImmediate();
else
currentActivity.onBackPressed();
}
public static void clickItem(AbsListView listView, int position) {
ListAdapter adapter = listView.getAdapter();
View itemView = adapter.getView(position, null, listView);
listView.performItemClick(itemView, position, adapter.getItemId(position));
}
public static void longClickItem(AbsListView listView, int position) {
if (!listView.isLongClickable())
return;
OnItemLongClickListener listener = listView.getOnItemLongClickListener();
if (listener == null)
return;
ListAdapter adapter = listView.getAdapter();
View itemView = adapter.getView(position, null, listView);
listener.onItemLongClick(listView, itemView, position, adapter.getItemId(position));
listView.performHapticFeedback(LONG_PRESS);
}
}

2 Modules Android project with Robolectric, Gradle, Android Studio

Start a new Android project this week, so I started to setup the development environment. To be honest, it is not an easy experience to me.

Features

Here are the features I got now:

  • Unit test with Robolectric. (Very fundamental requirement)
  • Unit tests are separated into an independent module. (Provide flexibility when project growing larger. And provide a more clear view of code organization)
  • Running unit tests recognized by Android Studio/IntelliJ unit test plugin and debug UTs in IDE. (This is very important when diagnose failure UT)
  • Running unit tests via CLI with gradle wrapper. (This is necessary requirement for CI servers)
  • Using resources in Robolectric test. (Avoid Resource Not Found exception in unit tests)
  • Test Android Annotation powered async implementation. (AA introduces new Async implementation, which is not supported by Robolectric by default)
  • AssertJ core support. (Fest has been deprecated since no one is maintain it now.)

Versions

The major difficulties that I met are version compatibility, I almost tried all available version combinations to make them all works. Here are the versions that I uses

  • Gradle: 2.1
  • Groovy: 2.3.6
  • Ant: 1.9.3
  • JVM: 1.6.0_65 (Apple Inc. 20.65-b04-462)
  • OS: Mac OS X 10.9.5 x86_64
  • Android Studio: 0.8.11 (build AI-135.1446794)
  • IntelliJ: IDEA 14 CE EAP, build IC-138.2458.8
  • Android gradle plugin: com.android.tools.build:gradle:0.13.0
  • Android ADT gradle plugin: com.neenbedankt.gradle.plugins:android-apt:1.4+
  • Compile SDK version: 20
  • Build tool version: 20.0.0
  • Robolectric: 2.3

Known Issues

My current solution isn’t perfect. But for now, I haven’t working solution for them. Hope it could be fixed in the future

  • AAR is not supported in Unit Test. (A tricky issue, I’ll explain more in detail later)
  • AssertJ-Android is not supported. (Cause by AAR support issue, alternative available.)

Project Structure and configurations

Here are the project structure:

1
2
3
4
5
6
7
8
RootProject
|- settings.gradle
|- build.gradle
|- Launcher
\- builde.gradle
\- UnitTest
|- build.gradle
\- UnitTest.iml

Here are the contents

\Settings.gradle
1
include ':Launcher', ':UnitTest'
\build.gradle
1
2
3
4
5
6
7
8
9
10
11
12
13
14
15
buildscript {
repositories {
mavenCentral()
}
dependencies {
classpath 'com.android.tools.build:gradle:0.13.0'
}
}
allprojects {
repositories {
mavenLocal()
mavenCentral()
}
}
\Launcher\build.gradle
1
2
3
4
5
6
7
8
9
10
11
12
13
14
15
16
17
18
19
20
21
22
23
24
25
26
27
28
29
30
31
32
33
34
35
36
37
38
39
40
41
42
43
44
45
46
47
48
49
50
51
52
53
54
55
56
57
58
59
60
61
62
63
64
65
66
67
68
69
70
buildscript {
repositories {
mavenCentral()
}
dependencies {
classpath 'com.android.tools.build:gradle:0.13.0'
classpath 'com.neenbedankt.gradle.plugins:android-apt:1.4+'
}
}
repositories {
mavenLocal()
mavenCentral()
}
apply plugin: 'com.android.application'
apply plugin: 'android-apt'
android {
compileSdkVersion 20
buildToolsVersion '20.0.0'
defaultConfig {
minSdkVersion 9
targetSdkVersion 19
versionCode 1
versionName "1.0"
}
buildTypes {
debug {
runProguard false
proguardFiles getDefaultProguardFile('proguard-android.txt'), 'proguard-rules.txt'
}
release {
runProguard false
proguardFiles getDefaultProguardFile('proguard-android.txt'), 'proguard-rules.txt'
}
}
}
apt {
arguments {
androidManifestFile variant.processResources.manifestFile
resourcePackageName 'me.timnew.game.launcher'
}
}
def AAVersion = '3.1'
dependencies {
apt "org.androidannotations:androidannotations:$AAVersion" // Process AA annotations
/*
* Android Studio will remove this line if you try to edit project configuration with GUI.
* It seems it is a bug of Android Studio since it does not understand DSL `apt`
*/
compile "org.androidannotations:androidannotations-api:$AAVersion" // AA Runtime API. Becareful
compile 'de.greenrobot:eventbus:2.2.1'
compile 'org.easytesting:fest-reflect:1.4.1'
compile 'com.google.guava:guava:18.0'
compile 'com.koushikdutta.ion:ion:1.3.8'
compile fileTree(dir: 'libs', include: ['*.jar', '*.aar']) // Well although I mentioned aar here, but it doesn't load correctly.
compile 'com.android.support:support-v4:20.0.0'
compile 'com.android.support:support-annotations:20.0.0'
compile 'com.android.support:appcompat-v7:20.0.0'
}
\UnitTest\build.gradle
1
2
3
4
5
6
7
8
9
10
11
12
13
14
15
16
17
18
19
20
21
22
23
24
25
26
27
28
29
30
31
32
33
34
35
36
37
38
39
buildscript {
repositories {
mavenCentral()
}
dependencies {
classpath 'com.android.tools.build:gradle:0.13.0'
}
}
apply plugin: 'java'
repositories {
mavenLocal()
maven { url "$System.env.ANDROID_HOME/extras/android/m2repository" } // Fix 'com.android.support:*' package not found issue
mavenCentral()
}
dependencies {
def appModule = project(':Launcher')
compile appModule
testCompile appModule.android.applicationVariants.toList().first().javaCompile.classpath // Include classes from main project
testCompile appModule.android.applicationVariants.toList().first().javaCompile.outputs.files
testCompile files(appModule.plugins.findPlugin("com.android.application").getBootClasspath())
testCompile('junit:junit:4.+') {
exclude module: 'hamcrest-core' // Exclude problematic 'hamcrest'
}
testCompile 'org.robolectric:robolectric:2.3'
testCompile 'org.mockito:mockito-core:1.9.5'
testCompile 'org.assertj:assertj-core:1.6.1'
}
tasks.withType(Test) {
scanForTestClasses = false
include "**/*Should.class"
include "**/*Test.class"
include "**/*Tests.class"
}

Why uses java plug-in instead of android unit test plug-ins

Well, Gradle DSL provides a lot of flexibility to developer. But it also brought a lot complexity to IDE implementation. To figure out project configuration, IDE need to parse and understand the gradle scripts. Not only DSLs provided by gradle but all stuff come with plug-ins. From IDE, this is almost an impossible mission. So IDE need to figure out a way to simplify the process, such as support a subset of DSL.

For Android project, IntelliJ has difficulties to understand the all variations of android unit test plug-ins. So it is not easy to make unit test runnable from IDE. To solve the issue, you either try to teach IDE about the DSL by providing plug-in to IDE, or uses some languages that IDE understood.

I tried some plug-in available today, but none of them works for me. So I decide to use java DSL, which IntelliJ understood natively. As a trade off, since java gradle plugin doesn’t understand Android Library, so it cannot import .aar libries.

Besides I tried all android unit test gradle plugins, I found all of them depends on android gradle plugin. And android plugin depends on AndroidManifest.xml and some other stuff. It is wield to provide an manifest for your unit test.

So as the final solution, I uses java plug-in, avoid using aar in the test.

Why so complicate

Configurate an working Android project isn’t as easy as it sounds. Differ from iOS community, Google isn’t strong-minded as Apple. As a consequence that Android community is fragmented and lack of unified solution. There are tons of solutions available, but you might need to try them one by one to figure out which fits your requirement.

To make your tool chain, dependencies, IDE work together, compatibility is always your enemy. Even Google has to publish Version Compatibility Table to mitigate the pain.

What a mess!!!!!

References posts, plugins or template projects

Here is a list of things that I tried but failed to fit my requirement. List here since it might be helpful to other people.

Otto and Android Annotations Compatibility Issue Analysis

Introduction

Otto is a great Android event bus solution developed by SquareUp guys. These guys extract the event bus related classes from Google’s Guava, and optimized it for Android. Event Bus is a great solution to keep your code away from messy anonymous or internal classes only used for event handling! And Otto’s simplicity and performance makes it used to be the most popular event bus solution in Android development.

Android Annotations, as known as AA, is another great library that makes Android developers’ lives a lot easier. Just annotating the code, AA helps developer handles the most boring or error-proning tasks for you, including binding widgets binding, asynchronous tasks, life time management, etc…

Issue

Otto and AA are the libraries focusing on different aspects. Theoretically speaking, there shouldn’t be any compatibility issue between them. But the reality Otto event is never delivered to AA annotated classes. By inspecting the code with step by step debugging, I found the root cause of the issue is Otto failed to located @Produce and @Subscribe annotated methods in AA generated code.

Analysis

After a few study work, I finally understood what is the reason behind:

For performance consideration, Android Annotations actually does it work during the compilation time instead of Runtime. AA will derive the annotated classes, and generate some code according to the annotations applied. During the runtime, the classes got instantiated is actually the derived classes instead of the original one, although in the code is accessed via the original class as interface.

Here is a simple example:

I have the class ServerListAdapter, which is used to provide data for a grid view.

1
2
3
4
5
6
7
8
9
10
11
12
13
14
15
16
17
18
19
20
21
22
23
24
25
26
27
28
29
30
31
32
33
34
35
36
37
38
39
40
41
42
43
44
45
46
47
48
49
50
@EBean
public class ServerListAdapter extends AdvBaseAdapter<InetAddress, ServerView> {
@RootContext
protected Context context;
@SystemService
protected LayoutInflater inflater;
@Bean
protected Bus bus;
public ServerListAdapter() {
super(new ArrayList<InetAddress>());
}
@AfterInject
protected void afterInject() {
bus.register(this);
}
@Override
protected ServerView createView(ViewGroup parent) {
return ServerView_.build(context);
}
@Override
protected ServerView updateView(ServerView itemView, InetAddress item) {
itemView.update(item);
return itemView;
}
@Subscribe
public void fetchServerStatus(DiscoveryStatusEvent event) {
setItems(event.addresses);
}
@Subscribe
public void onServerStatusUpdated(DiscoveryStatusChangedEvent event) {
switch (event.type) {
case SERVER_ONLINE:
getItems().add(event.address);
break;
case SERVER_OFFLINE:
getItems().remove(event.address);
break;
}
notifyDataSetChanged();
}
}

And this is the derived class generated by AA during the compiling-time:

1
2
3
4
5
6
7
8
9
10
11
12
13
14
15
16
17
18
19
20
21
22
23
24
25
26
27
28
public final class ServerListAdapter_
extends ServerListAdapter
{
private Context context_;
private ServerListAdapter_(Context context) {
context_ = context;
init_();
}
public static ServerListAdapter_ getInstance_(Context context) {
return new ServerListAdapter_(context);
}
private void init_() {
inflater = ((LayoutInflater) context_.getSystemService(Context.LAYOUT_INFLATER_SERVICE));
context = context_;
bus = Bus_.getInstance_(context_);
afterInject();
}
public void rebind(Context context) {
context_ = context;
init_();
}
}

And here is how it is consumed:

1
2
3
4
5
6
7
8
9
10
11
12
13
14
15
16
17
18
19
20
21
22
23
24
@EFragment(R.layout.fragment_server_list)
public class ServerListFragment extends Fragment {
@Bean
protected DiscoveryService discoveryService;
@Bean
protected ServerListAdapter adapter;
@ViewById(R.id.server_list)
protected GridView serverGridView;
@AfterViews
protected void afterViews() {
serverGridView.setAdapter(adapter);
discoveryService.start();
}
@Override
public void onDetach() {
super.onDetach();
discoveryService.stop();
}
}

As you can see, in the ServerListFragment, the ServerListAdapter instance injected into bean is actually the instance of ServerListAdapter_. And due to polymorphic, the instance just behaves like a ServerListAdapter instance.

On the other hand, according to the description on Otto’s Home Page:

In order to receive events, a class instance needs to register with the bus.

Registering will only find methods on the immediate class type. Unlike the Guava event bus, Otto will not traverse the class hierarchy and add methods from base classes or interfaces that are annotated. This is an explicit design decision to improve performance of the library as well as keep your code simple and unambiguous.

Otto only search annotations in direct class, which is ServerListAdapter_ in instance, and there isn’t any annotation included. As a consequence, all the @Subscribe annotated methods are ignored by com.squareup.otto.AnnotatedHandlerFinder. So the posted events become dead event due to no subscriber found.

Comments

There is rumor that this issue will be fixed in Otto 2.0. But according to the comment from Jake Wharton, Otto’s developer, Otto 2.0 will take forever to release.

In fact Otto 2.0 Repo has been not touched for 2 years already. Although we could check out the code and build Otto 2.0 by ourselves, but it takes efforts. Especially when some bug is found.

Conclusion

Luckily, although Otto turns into “maintenance mode”, the compatibility issue takes forever to resolve. I found a great Otto alternative, EventBus from GreenRobot. A boring name, but great library.

According to EventBus‘s document, it provides richer feature and better performance than Otto.
The most important EventBus is friendly to AndroidAnnoations. They two works well together.

EventBus and Otto Feature Comparison

EventBus Otto
Declare event handling methods Name conventions Annotations
Event inheritance Yes Yes
Subscriber inheritance Yes No
Cache most recent events Yes, sticky events No
Event producers (e.g. for coding cached events) No Yes
Event delivery in posting thread Yes (Default) Yes
Event delivery in main thread Yes No
Event delivery in background thread Yes No
Asynchronous event delivery Yes No

EventBus and Otto Performance Comparison

EventBus over Otto
Posting 1000 events, Android 2.3 emulator ~70% faster
Posting 1000 events, S3 Android 4.0 ~110% faster
Register 1000 subscribers, Android 2.3 emulator ~10% faster
Register 1000 subscribers, S3 Android 4.0 ~70% faster
Register subscribers cold start, Android 2.3 emulator ~350% faster
Register subscribers cold start, S3 Android 4.0 About the same

Android Studio 0.6.1 SDK recognition issue when using Android SDK 19 and Gradle

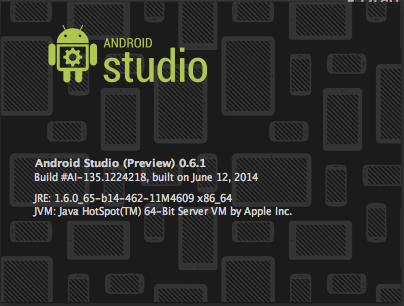
A few days ago I upgraded my Android Studio to version 0.6.1. And migrated my android project build system from Maven to Gradle. Then nightmare happened!

Android Studio Version

It looks there are some issue with Android Studio version 0.6.1, which cannot recognize the jar files in Android SDK 19 (4.4 Kit Kat). As a consequence that all the Android fundemantal classes are not recognized properly, which makes IDEA almost impossible to be used.

Classes Not Recognized

After spending days on googling and trying, I realize the issue is caused that Android Studio doesn’t recognize the sdk 19 content properly.

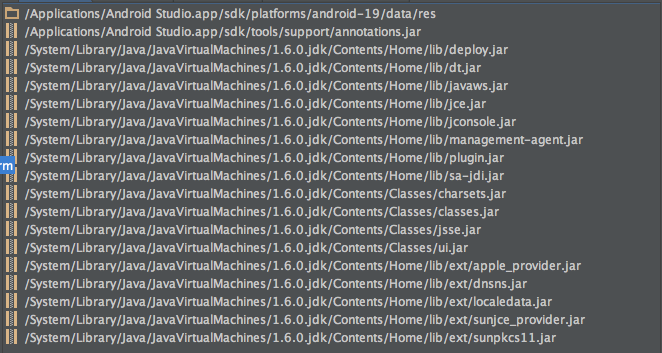
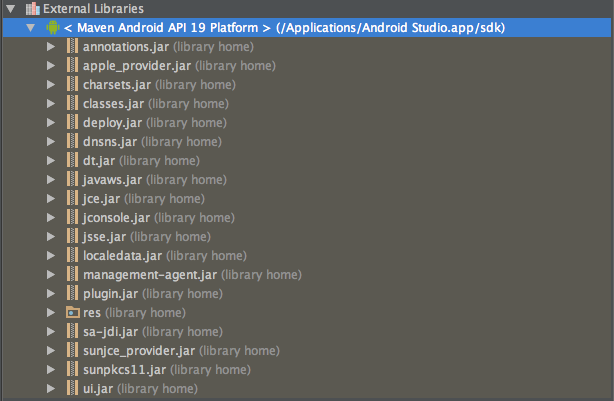
Here is the content of Android SDK 19 that Android Studio 0.6.1 identified:

SDK in Android Studio

As comparison, here is a list of proper content of Andrdoid SDK 19 with Google API:

SDK in IDEA

Here is a list of proper content of Andrdoid SDK 19 retrived from Maven Repository:

Maven SDK

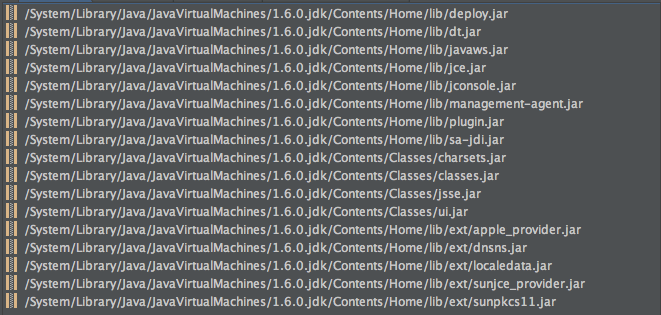
In the list, you can easily figure out that the android.jar file is missing! It is the reason why the classes are not properly recognized! Even more if you compare the list against the JDK 1.6, you will find that most of the content are the same.

JDK

Ideally, to fix this issue should be quite easy. Android Studio provides a Project Settings dialog allow developer to adjust the SDK configurations.

Project Settings Dialog:

Project Settings

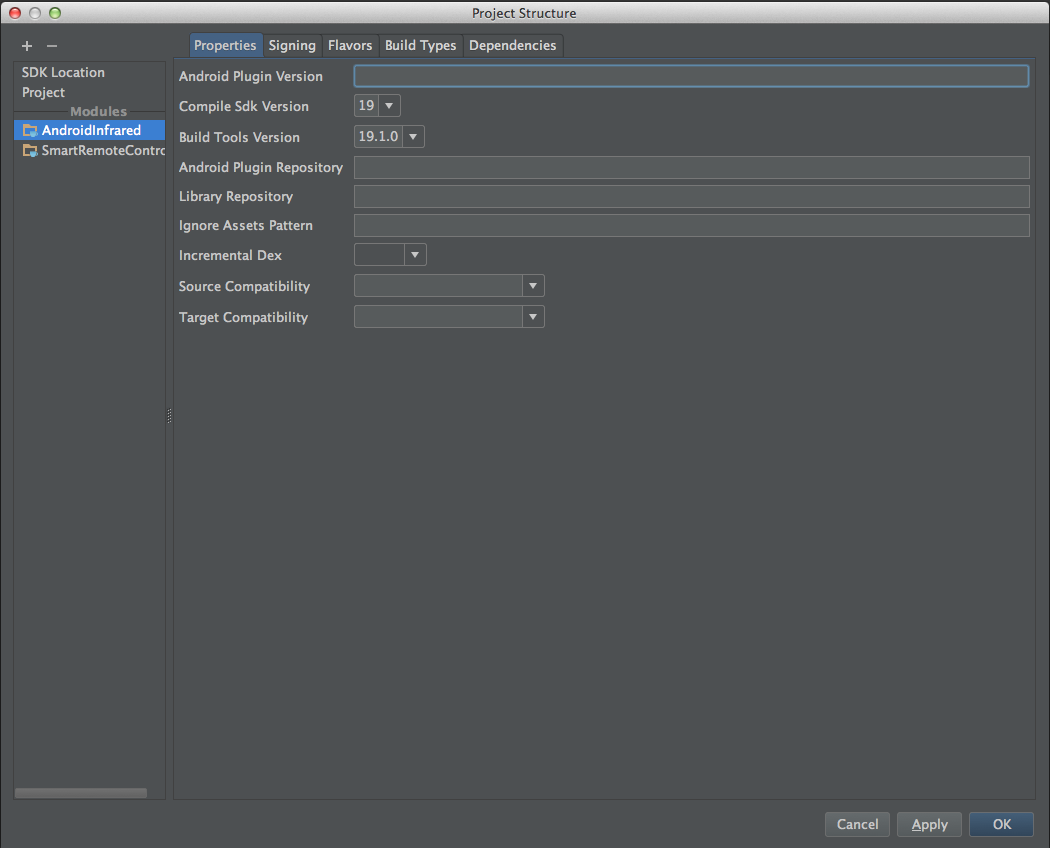
But for Gradle projects, Android Studio displays a greately simplified project settings dialog instead of the original one, which doesn’t allow developer to config the SDK in dialog any longer.

Gradle Project Settings Dialog:

Project Settings

Still now, I figured out several potentisal workarounds to this issue, hope these helps:

  1. Downgrade the SDK version from 19 to 18 fixes the issue.
    If you not really needs SDK 19 features, try to downgrade the SDK version to 18 to fix the issue.
  2. Use IntelliJ instead of Android Studio
    I encounters a different issue when using IDEA, it fails to sync the Gradle file.
  3. Use Maven or ANT instead of Gradle
    Gradle is powerful, but there are too many environment issues when using with IDEs… Maven is relatively more stable.

I haven’t figure out a perfect solution to this issue, just hope the Google can fix the issue as soon as possible.

Is Android API document on ConsumerIrManager lying?

Just found a shocking fact that Android API document on ConsumerIrManger.transmit method is wrong!

KitKat has realised its own Infrared blaster API, which is incompatible with legacy Samsung private API. So I was working on Android Infrared Library to make it adapted automatically on both Samsung private API and Kit Katofficial API.

After I finished the coding according the document, I found the app broke on my Galaxy Note 3 with Kit Kat. It works perfect when running on Jelly Bean.

And I figured out an issue that it takes longer time to transmit the same seqeunce when I upgraded API. (When IR blaster is working, the LED indicator on the phone turns blue. And I found the time of indicator turning blue is significant longer than before.) And my IRRecorder cannot recognize the sequence sent by my phone any longer.

After spent several hours, I figured out the reason. The pattern was encoded in a wrong way. But I’m pretty sure that I strictly followed the API document.

So I get a conculusion that the ConsumerIrManager implementation on Samsung Note 3 is different to what described in Android API document. However I’m not sure the reason is that the Android document is lying or Samsung implemented the driver in a wrong way.

Here is the technical details of the issue and its solution:

IR Command is trasmitted by turnning the IR blaster LED on and off for a certain period of time. So each IR command can be represented by a series of time periods, which indicates how long the led is on or off. The difference between Samsung API and Kit Kat APi is that how the time is mesured.

carrierFrequency The IR carrier frequency in Hertz.
pattern The alternating on/off pattern in microseconds to transmit.

According to the Android Developer Refernece), the time in KitKat is measured in the unit of microseconds.

But for Samsung, the time is mesured by the number of cycles. Take NEC encoding as example, the frequency is 38kHz. So the cycle time T ~= 26us. BIT_MARK is 21 cycles, the period of time is around 26us x 21 ~= 546us.

So ideally, regardless of lead-in and lead-out sequence, to send the code 0xA in NEC encoding, Samsung API needs 21 60 21 21 21 60 21 21; and Kit Kat API needs 560 1600 560 560 560 1600 560 560.

But accroding to my experience, the Android Developer Reference is wrong. Even in KitKat, the time sequence is also measure by number of cycles instead of the number of microseconds!

So to fix the issue, you need some mathmatical work. Here is the conversion formula:

1
2
3
4
5
6
7
n = t / T = t * f / 1000
n: the number of cycles
t: the time in microseconds
T: the cycle time in microseconds
f: the transmitting frequency in Hertz

App crash issue when inflating ViewPager

I wrote a very simple layout file with a ViewPager, but the app crashes when inflating it.

Layout file
1
2
3
4
5
6
7
8
9
10
11
12
<?xml version="1.0" encoding="utf-8"?>
<FrameLayout xmlns:android="http://schemas.android.com/apk/res/android"
android:layout_width="match_parent"
android:layout_height="match_parent">
<ViewPager
android:id="@+id/view_pager"
android:layout_width="match_parent"
android:layout_height="match_parent" />
</FrameLayout>

Here is the error message:

1
2
3
4
5
6
7
8
9
10
11
12
13
14
15
16
17
18
19
20
21
22
23
24
25
26
27
28
29
30
31
32
33
34
35
36
37
38
39
40
41
42
43
44
45
46
47
48
49
50
51
52
53
54
55
56
57
58
59
60
61
62
63
64
65
66
67
68
69
70
71
72
73
04-22 22:27:00.828 1128-1479/com.github.timnew.rubiktimer E/AndroidRuntime﹕ FATAL EXCEPTION: main
Process: com.github.timnew.rubiktimer, PID: 1128
java.lang.RuntimeException: Unable to start activity ComponentInfo{com.github.timnew.rubiktimer/com.github.timnew.rubiktimer.history.HistoryActivity_}: android.view.InflateException: Binary XML file line #7: Error inflating class ViewPager
at android.app.ActivityThread.performLaunchActivity(ActivityThread.java:2282)
at android.app.ActivityThread.handleLaunchActivity(ActivityThread.java:2340)
at android.app.ActivityThread.access$800(ActivityThread.java:157)
at android.app.ActivityThread$H.handleMessage(ActivityThread.java:1247)
at android.os.Handler.dispatchMessage(Handler.java:102)
at android.os.Looper.loop(Looper.java:157)
at android.app.ActivityThread.main(ActivityThread.java:5293)
at java.lang.reflect.Method.invokeNative(Native Method)
at java.lang.reflect.Method.invoke(Method.java:515)
at com.android.internal.os.ZygoteInit$MethodAndArgsCaller.run(ZygoteInit.java:1265)
at com.android.internal.os.ZygoteInit.main(ZygoteInit.java:1081)
at dalvik.system.NativeStart.main(Native Method)
Caused by: android.view.InflateException: Binary XML file line #7: Error inflating class ViewPager
at android.view.LayoutInflater.createViewFromTag(LayoutInflater.java:713)
at android.view.LayoutInflater.rInflate(LayoutInflater.java:761)
at android.view.LayoutInflater.inflate(LayoutInflater.java:498)
at android.view.LayoutInflater.inflate(LayoutInflater.java:398)
at android.view.LayoutInflater.inflate(LayoutInflater.java:354)
at com.android.internal.policy.impl.PhoneWindow.setContentView(PhoneWindow.java:340)
at com.actionbarsherlock.internal.ActionBarSherlockNative.setContentView(ActionBarSherlockNative.java:134)
at com.actionbarsherlock.app.SherlockFragmentActivity.setContentView(SherlockFragmentActivity.java:262)
at com.github.timnew.rubiktimer.history.HistoryActivity_.setContentView(HistoryActivity_.java from OutputFileObject:44)
at com.github.timnew.rubiktimer.history.HistoryActivity_.onCreate(HistoryActivity_.java from OutputFileObject:34)
at android.app.Activity.performCreate(Activity.java:5389)
at android.app.Instrumentation.callActivityOnCreate(Instrumentation.java:1105)
at android.app.ActivityThread.performLaunchActivity(ActivityThread.java:2246)
            at android.app.ActivityThread.handleLaunchActivity(ActivityThread.java:2340)
            at android.app.ActivityThread.access$800(ActivityThread.java:157)
            at android.app.ActivityThread$H.handleMessage(ActivityThread.java:1247)
            at android.os.Handler.dispatchMessage(Handler.java:102)
            at android.os.Looper.loop(Looper.java:157)
            at android.app.ActivityThread.main(ActivityThread.java:5293)
            at java.lang.reflect.Method.invokeNative(Native Method)
            at java.lang.reflect.Method.invoke(Method.java:515)
            at com.android.internal.os.ZygoteInit$MethodAndArgsCaller.run(ZygoteInit.java:1265)
            at com.android.internal.os.ZygoteInit.main(ZygoteInit.java:1081)
            at dalvik.system.NativeStart.main(Native Method)
Caused by: java.lang.ClassNotFoundException: Didn't find class "android.view.ViewPager" on path: DexPathList[[zip file "/data/app/com.github.timnew.rubiktimer-76.apk"],nativeLibraryDirectories=[/data/app-lib/com.github.timnew.rubiktimer-76, /vendor/lib, /system/lib]]
at dalvik.system.BaseDexClassLoader.findClass(BaseDexClassLoader.java:67)
at java.lang.ClassLoader.loadClass(ClassLoader.java:497)
at java.lang.ClassLoader.loadClass(ClassLoader.java:457)
at android.view.LayoutInflater.createView(LayoutInflater.java:565)
at android.view.LayoutInflater.onCreateView(LayoutInflater.java:658)
at com.android.internal.policy.impl.PhoneLayoutInflater.onCreateView(PhoneLayoutInflater.java:66)
at android.view.LayoutInflater.onCreateView(LayoutInflater.java:675)
at android.view.LayoutInflater.createViewFromTag(LayoutInflater.java:700)
            at android.view.LayoutInflater.rInflate(LayoutInflater.java:761)
            at android.view.LayoutInflater.inflate(LayoutInflater.java:498)
            at android.view.LayoutInflater.inflate(LayoutInflater.java:398)
            at android.view.LayoutInflater.inflate(LayoutInflater.java:354)
            at com.android.internal.policy.impl.PhoneWindow.setContentView(PhoneWindow.java:340)
            at com.actionbarsherlock.internal.ActionBarSherlockNative.setContentView(ActionBarSherlockNative.java:134)
            at com.actionbarsherlock.app.SherlockFragmentActivity.setContentView(SherlockFragmentActivity.java:262)
            at com.github.timnew.rubiktimer.history.HistoryActivity_.setContentView(HistoryActivity_.java from OutputFileObject:44)
            at com.github.timnew.rubiktimer.history.HistoryActivity_.onCreate(HistoryActivity_.java from OutputFileObject:34)
            at android.app.Activity.performCreate(Activity.java:5389)
            at android.app.Instrumentation.callActivityOnCreate(Instrumentation.java:1105)
            at android.app.ActivityThread.performLaunchActivity(ActivityThread.java:2246)
            at android.app.ActivityThread.handleLaunchActivity(ActivityThread.java:2340)
            at android.app.ActivityThread.access$800(ActivityThread.java:157)
            at android.app.ActivityThread$H.handleMessage(ActivityThread.java:1247)
            at android.os.Handler.dispatchMessage(Handler.java:102)
            at android.os.Looper.loop(Looper.java:157)
            at android.app.ActivityThread.main(ActivityThread.java:5293)
            at java.lang.reflect.Method.invokeNative(Native Method)
            at java.lang.reflect.Method.invoke(Method.java:515)
            at com.android.internal.os.ZygoteInit$MethodAndArgsCaller.run(ZygoteInit.java:1265)
            at com.android.internal.os.ZygoteInit.main(ZygoteInit.java:1081)
            at dalvik.system.NativeStart.main(Native Method)
According to the message, we can figure out that the issue is caused because Android cannot found the class android.view.ViewPager.

If we’re careful enough, we can figure out that there is something wrong with the ViewPager fullname. Since ViewPager isn’t a standard widget, so it is provided in Support Library instead in the core SDK. So it is not in the package of android.view, it is in the pacakge android.support.v4.view.

To fix the issue, we should not reference the ViewPager with plain name but with the full name android.support.v4.view.ViewPager.

So this is the updated layout xml:

Fixed Lyaout
1
2
3
4
5
6
7
8
9
10
11
12
<?xml version="1.0" encoding="utf-8"?>
<FrameLayout xmlns:android="http://schemas.android.com/apk/res/android"
android:layout_width="match_parent"
android:layout_height="match_parent">
<android.support.v4.view.ViewPager
android:id="@+id/view_pager"
android:layout_width="match_parent"
android:layout_height="match_parent" />
</FrameLayout>

Start Acitivity in background on Android 4.4 KitKat

For some reason, Android 4.4 KitKat has changed the implementation while starting activity.

In Android 4.3, Activity started from inactive Activity is also inactive.
But in Android 4.4, Activity started form inactive Activity will be brought to front.
Here, Inactive Activity means the activity paused by user pressing Home button or switch to another app.

This change won’t be felt in most sceanrios. But for activities that started from AsyncTask, it does have some significant impact on user experience.

I’m working on a app, that shows a Splash Screen when user logged in. And the Splash screen is implemented with activity.

It takes some time for app to communicate with backend server during the loggin in, and user might press “Home” button to temporarily leave the app during the time.

I don’t want the my splash screen to interrupt the user if the user returned to the home screen. So I wish to start the splash screen activity in the background if current acitivity has been brought to background.

It isn’t an issue on Android 4.3, but on Android 4.4 KitKat, it causes problem.
I googled this issue and tried the FLAG_ACTIVITY_MULTIPLE_TASK, and comfirmed that it is not helping to this issue.

So I have to come up some kind of “hacking” solution as described below:

I add a isPaused property to BaseAcitity, which is the base class of all activities in my app.

Add isPaused to BaseActivity
1
2
3
4
5
6
7
8
9
10
11
12
13
14
15
16
17
18
19
20
21
22
23
24
public class BaseActivity extends FragmentActivity {
public static final String START_FROM_PAUSED_ACTIVITY_FLAG = "START_FROM_PAUSED_ACTIVITY_FLAG";
protected boolean paused = false;
@Override
protected void onPause() {
super.onPause();
paused = true;
}
@Override
protected void onResume() {
super.onResume();
paused = false;
}
public boolean isPaused() {
return paused;
}
}

Then when I start the start the SplashActivity, I’ll put the isPaused value into the intent.

Add flag when start activity
1
2
3
4
5
6
7
8
Intent intent = new Intent(activity, SplashActivity.class);
boolean isStartingFromBackgroundActivity = activity.isPaused();
intent.putExtra(BaseActivity.START_FROM_PAUSED_ACTIVITY_FLAG, isStartingFromBackgroundActivity);
startActivity(intent);

And check isPaused value in onCreate callback in SplashAcitivity, and push the SplashAcitivty to background if the value is true.

Check flag when activity is created
1
2
3
4
5
6
7
8
9
10
11
12
13
14
@Override
public void onCreate(Bundle savedInstanceState) {
super.onCreate(savedInstanceState);
if (isStartedFromBackgroundActivity())
moveTaskToBack(true);
}
private boolean isStartedFromBackgroundActivity() {
return getIntent().getBooleanExtra(START_FROM_PAUSED_ACTIVITY_FLAG, false);
}

NPMethod called on non-NPObject wrapped JSObject

I’m working on a “hybrid” android appilcation. In the app, part of the UI was written in HTML and hosted in a WebView. And I exposed several Java objects to JavaScript as Java Script Interface.

Setup WebView
1
2
webView.getSettings().setJavaScriptEnabled(true);
webView.addJavascriptInterface(irBlaster, "irBlaster");

The irBlaster object contains several methods, and js will invoke the specific method according to the data-attribute bound to the element.

Script that handles the button click in HTML
1
2
3
4
5
6
7
8
9
10
onIrButtonClicked: (e) =>
$button = $(e.currentTarget)
type = $button.data('irType')
sendFunc = irBlaster[type]
code = @parseCode($button.data('irCode'))
length = $button.data('irLength')
sendFunc(length, code)

The previous coffee-script works fine in my Jasmine tests with javascript mock version of irBlaster. When the button clicked, the proper method was invoked with proper arguments.
But when I run this code with real android app, WebView yields error says “NPMethod called on non-NPObject wrapped JSObject”.

The error message looks quite hard to understand the meaning, so I spent quite time to diagnose the code.

After several try, I found the following code works fine, but original one doesn’t:

Code works
1
2
3
4
5
6
7
8
9
10
11
12
13
14
15
16
onIrButtonClicked: (e) =>
$button = $(e.currentTarget)
type = $button.data('irType')
switch irBlaster[type]
when 'NEC'
code = @parseCode($button.data('irCode'))
length = $button.data('irLength')
irBlaster.NEC(length, code)
.
.
.

So I realize the issue was occurd in the javascript contextual binding.

Javascript is function-first-citizen language, and method call on object was simulate by invoking the function with specific context, and the code behavior won’t change if there is no reference to this pointer in the method. So it is quite normal that fetch a method from a object than invoke it without context.

That is why the Jasmine tests passed successfully. But the irBlaster isn’t real or simple javascript, but a native java object provided by js binding interface, so there is a limitation that the method on it cannot be invoked without context. Or it causes error.

So the issue can be resolved as following code by invoking the method in a “reflection” flavor:

Invoking native binding object with context provided in HTML
1
2
3
4
5
6
7
8
9
10
onIrButtonClicked: (e) =>
$button = $(e.currentTarget)
type = $button.data('irType')
sendFunc = irBlaster[type]
code = @parseCode($button.data('irCode'))
length = $button.data('irLength')
sendFunc.call(irBlaster, length, code)

In previous code, I invoke the sendFunc with call, and provids irBlaster as the context as this. So the problem solved, the code runs smoothly without issue.

Dynamically inflates UI in Android App

There is a fascinating idea that inflates UI according to an android layout xml downloaded from server. According to the Android API, it looks quite feasible.

One of LayoutInflate.inflate method overloads accept Layout Xml as XmlPullParser.

And XmlPullParser can wrap around an input stream, so as consequence, following code seems to be working:

Inflate view on the fly
1
2
3
4
5
6
7
8
9
10
11
12
13
14
15
16
17
18
19
20
21
22
public class DynamicView extends FrameLayout {
public DynamicView(Context context, InputStream layoutData) throws XmlPullParserException {
super(context);
createView(context, layoutData);
}
private void createView(Context context, InputStream layoutData) throws XmlPullParserException {
LayoutInflater inflater = (LayoutInflater) context.getSystemService(Context.LAYOUT_INFLATER_SERVICE);
XmlPullParserFactory factory = XmlPullParserFactory.newInstance();
factory.setNamespaceAware(true);
XmlPullParser parser = factory.newPullParser();
parser.setInput(layoutData, "UTF-8");
inflater.inflate(parser, this, true);
}
}

The code looks great, compiling looks fine, but when the code excuted, an exception is thrown by the inflater.

According to the LayoutInflater document, this approach won’t work(at least for now, it won’t).

For performance reasons, view inflation relies heavily on pre-processing of XML files that is done at build time. Therefore, it is not currently possible to use LayoutInflater with an XmlPullParser over a plain XML file at runtime.

Actually, Android compiler compiles the layout xml files into binary xml block, which has convert attributes into some special format. And in Android SDK, the LayoutInflater uses XmlResourceParser instead of plain XmlPullParser, which is created by XmlBlock.

XmlBlock is an internal class used in Resources to cache the binary xml document.

And there is no way to create XmlResourceParser or other classes to inject custom behavior into this process. Personally assume that it is pretty much related to the Android Resource and Theming mechanism, there are quite a number cross references between resources. To make it works in a efficient way, Android Runtime did a lot work, such as cache and pre-processing. To override this behavior require quite a number of work and need to aware of potential performance issue. Since the inflating could happen quite often during navigation.

As a not that fansy alternative, UI based on HTML hosted in WebView could be considered.